
Okay, first things first, what is an AI agent? According to an AI agent itself:
An AI agent is a software that sees what’s around it, processes information, and takes actions to reach specific goals, often mimicking human thinking and problem-solving.
Microsoft describes their Copilots as “the UI of AI”, and I really like this definition. I think these intelligent agents have the potential to replace many of the software tools we use today. Let’s face it - no one enjoys navigating through complicated dashboards or scrolling through endless buttons and menu items to work with these tools.
Consider self-service checkouts at supermarkets. We used to pay at a cashier who scanned our items. Now, with self-service checkouts, you scan items yourself. While it’s usually faster and convenient, it can be challenging to find and scan specific items like vegetables, fruit, or your favorite cinnamon rolls. Previously, the cashier took care of this, but now you have to navigate these systems on your own.
AI-powered agents can save you from this frustration. Soon, they may be able to recognize products, identify the correct type, and scan them for you—just like cashiers did in the past. Curious to see an AI agent up close? The best way is to build one yourself.
Prerequisites
To follow this tutorial, you’ll need:
- Python 3.8+: Experience with Python basics is required
- Visual Studio Code: Or any other code editor of your choice
- REST API knowledge: Basic understanding of REST APIs and HTTP methods
- Flask: We’ll use Flask for the API - I’ll provide the code, but familiarity helps
- Ollama: Install Ollama on your machine. See my post about prompt engineering if you need help getting started.
Clone the sample code repository to follow along.
Make sure you have Python and Ollama installed before proceeding:
| |
About Our Agent
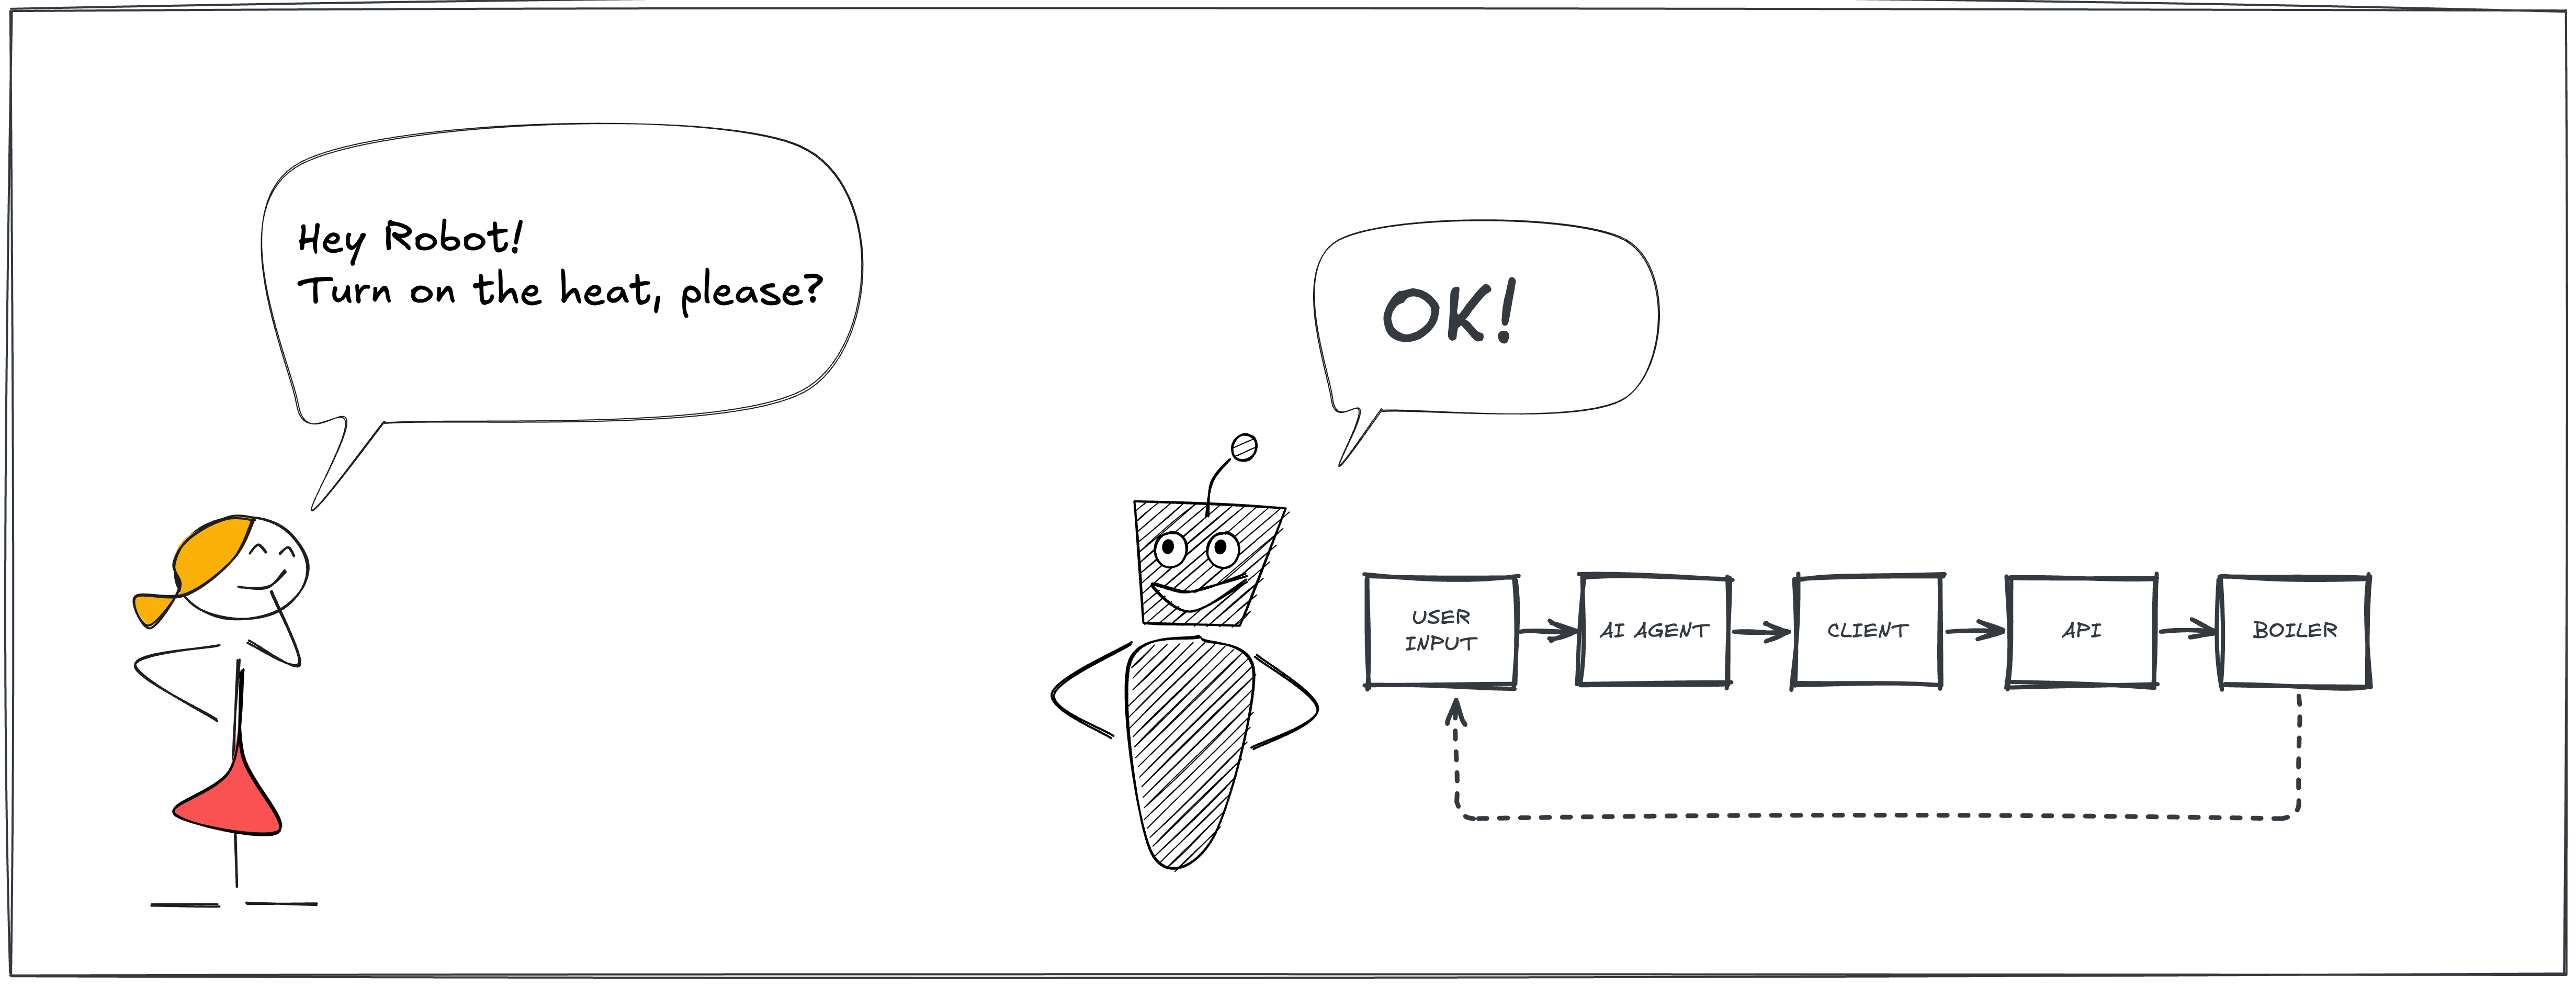
Last December we moved into our new home, and I have to admit, I’ve spent some (perhaps too much…) time setting up the smart thermostat. This inspired me to build an AI agent to control a theoretical smart heating system. Don’t worry; we won’t be tinkering with a real boiler here. Instead, the agent will interact with a mock smart thermostat via a simple REST API. Since I plan to use Ollama with Python, it made sense to use Python for the REST API as well.
Let’s dive in!
Setting the Table: Building the REST API
First, we need to create a REST API that our AI agent can interact with. We’ll use the Flask framework for this. To shave off some time, I’ve scaffolded the REST API itself for you. Who am I lying to? 😀 I asked Copilot to help me figure out how a theoretical smart thermostat API would look like. Below is what it came up with - but please, lower your expectations. This post is not about crafting an award-winning API. If my AI agent can interact with it, that’s good enough for me.
Draft of the Endpoints
Since I never worked with a smart thermostat API before, I cannot guarantee that this is the best design. However, I believe the endpoints below are fair enough for this experiment.
| Operation | Endpoint | Method |
|---|---|---|
| Get actual temperature | /thermostat/actual | GET |
| Get desired temperature | /thermostat/desired | GET |
| Set desired temperature | /thermostat/desired | POST |
| Get boiler state | /boiler/state | GET |
| Get error code | /boiler/error | GET |
If you feel more comfortable with Swagger, you can find the OpenAPI specification on the GitHub repository. Paste it into the Swagger Editor to visualize the API.
Implementing the API
The API is a Flask service with the endpoints described above. I’ve declared some global variables to store the actual and desired temperatures, the boiler state, and the error code:
| |
If you dig into the code, you may find some other interesting things, like the temperature adjustment thread control:
| |
…and the code of the temperature adjustment thread itself:
| |
I’ve added this little twist to simulate a realistic heating system. The adjust_temperature function runs in a separate thread, continuously updating the actual temperature at regular intervals (every TEMPERATURE_UPDATE_INTERVAL seconds). This allows us to observe the boiler state changing and the actual temperature fluctuating, gradually aligning with the desired temperature - like in the real world. Okay, maybe a bit faster than in the real world, but you get the idea.
Alright, let’s see if it works or not!
| |
If everything goes well, you should see the following output:
| |
You can now test the API by sending requests to its endpoints using a tool such as Postman, or any other tool you prefer.
Let’s verify the API by asking about the current temperature:
| |
Great! The API is up and running. 👏
Creating a Python Client for the API
Before we get to the fun part, let’s create a Python client to interact with the API. Why, you ask? By specifying these Python functions to our LLM agent, it can understand their functionality and purpose. The agent will then determine if the tasks we assign require interaction with the thermostat API or not.
This Python library will serve as the glue between the agent and the thermostat API.
Good news is, I’ve already created the Python client for you, please find it in the GitHub repository. The script is called boiler_client.py.
You can test it by running the following command:
| |
☝️ If you run the script again, you should see the actual temperature increased a notch. Remember? This is because the
adjust_temperaturefunction is running in the background, gradually adjusting the actual temperature to the desired one.
Giving Clues to the AI
If you have a keen eye, you may have noticed that the methods of the BoilerClient class are pretty extensively documented. From version 0.4 onward, the Ollama Python library uses these docstrings to inform the agent about the purpose of each method. This helps the agent understand the functionality and appropriate usage of each method.
| |
When documenting your code, strive to be as precise and descriptive as possible. Here, I’ve even specified that the temperature is in Celsius.
What times we live in! It’s as if I’ve completely lost my mind — while some people are concerned about AI taking over their jobs, here I am, assisting it with documentation 🤷.
Building the AI Agent
Now the fun part begins! Let’s assemble our AI agent using Ollama and the Python library, to control the imaginary smart thermostat via a small CLI tool. We’ll use the Mistral NeMo model.
Not all LLMs support tools. When selecting the perfect model for your project, look for those marked with the “tools” tag in the Model Library.
Why Mistral-NeMo? Mistral-NeMo is an ideal choice because:
🔧 Tool Compatibility: Has the ability to use tools.
📄 License: Distributed under a permissive Apache 2.0 license.
⚡ Powerful and Compact: Offers very good performance with a relatively small model size.
The System Prompt
Let’s get started by crafting our system prompt:
| |
This system prompt defines the AI agent’s role as a smart boiler assistant while setting boundaries to ensure it only provides responses related to our topic. It uses our API - via the Python client - for interacting with the boiler.
Next, define a helper function to get the available functions from the boiler client. While this might seem overkill, it really helps manage the code as the number of functions increases.
| |
Since the magic happens there, let’s focus on the important parts of the get_model_response function:
| |
Most of the parameters might look familiar, but for the sake of clarity, let’s run through them:
model: The Mistral-NeMo model we’re using - declaring it as a parameter allows us to use different models later.messages: Here, we provide the system prompt (see above) and the user’s prompt (which we will cover later).tools: This is the interesting part. We pass the available functions from the boiler client to this parameter. We inform Ollama that the agent can use these functions to interact with our boiler API.
☝️ Feel free to refactor the
toolsparameter declaration to use thedictfrom theget_available_functionshelper function. I kept it here as it is to help illustrate the concept better.
Then we can proceed and verify if the agent actually called the functions from the boiler client or not.
| |
If there are no tool calls in the first response, we return the content of that response just as we would without tools.
Otherwise, we iterate over the tool calls and invoke the corresponding functions from the boiler client. As you can see, our Python client handles the function calls itself, while the model specifies the function name (and arguments, if any).
How we handle the output of these functions is up to us. In some cases, we might process or manipulate the output, while in others we might simply pass it back to the model as is.
In our case, we append the output to the messages list and pass it back to the model. It’s important to use the "tool" role in the messages list to indicate that the output is from a tool.
Behind the Scenes
As I mentioned early, I’ve documented the boiler client methods pretty well for a reason. Normally, we should craft a JSON scheme for the tool definitions, but Ollama can infer the definitions from the docstrings and the code itself, using Pydantic under the hood.
For example, take a look at the get_actual_temperature method’s schema:
| |
☝️ If you insist on crafting the JSON schema yourself, you can assign the structure above to a variable and pass it to the
toolsparameter.
Interacting with the User
Let’s keep it simple. We will create a loop and ask the user for input until they decide to exit, typing bye. After each user input, we call the get_model_response function we just discussed and print the response.
🏠 Home Work: Create a Streamlit app to take this experiment to the next level.
See Our Agent in Action
It’s showtime! Let’s run the whole thing and see how our AI agent interacts with the boiler API. Since we’re already have VsCode at hand, I suggest you to open a new terminal and run the API server in the background:
| |
Then, in another terminal, run the agent:
| |
Almost forgot! Don’t forget to pull the Mistral-NeMo model from Ollama before running the agent:
| |
Also, you might need to issue ollama serve to start the Ollama server if it’s not running already.
Now you can interact with the agent by typing your free form questions and commands. The agent will respond accordingly, interacting with the boiler API as needed. Here’s a sample interaction:
| |
If you peek under the hood of the API server, you should see how the agent interacts with it:
| |
Here is the evidence that our AI agent is not merely mimicking the interaction, but is genuinely engaging with the boiler API. 👍
Conclusion
Fantastic work - thank you for staying with me until the end! In this tutorial:
- 🤖 We’ve built an AI agent that interacts with a mock smart thermostat API.
- ⚙️ We’ve learned how to instruct the agent to use our code to control the heating.
- 🔧 We’ve seen how to handle tool calls and responses in the agent code.
- 🚀 Finally, we’ve seen how the whole system works together in a real-world…ish scenario.
Needless to say, chatting with a robot is not the most exciting or effective way to control your heating system. However, you can apply the same principles to build agents that interact with other APIs, services, or even IoT devices.
You don’t need to think big - the potential real-world application of this technology is approaching quickly. Embrace it! Here are some ideas to spark your inspiration:
📰 Create an AI agent to fetch the latest articles from your favorite news site and compile your own daily digest or newsletter.
📝 Develop an AI agent to analyze your git logs and generate work log summaries for your Jira tickets. Why stop here? The agent should add the the work logs to Jira as well!
👨🍳 Create an AI agent as a Telegram bot that provides personalized weekly meal plans with recipes and shopping lists based on your dietary preferences (just put it into the system prompt).
I hope I sparked your imagination! Feel free to share your ideas or ask questions in the comments section below. Until next time, happy crafting! 🚀